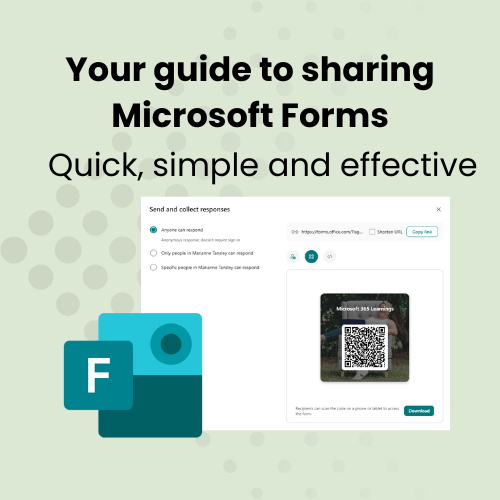
Whether you are an admin professional or a small business owner, I really hope you’re using Microsoft Forms to gather data - it could be event registrations, feedback, surveys, or even a super quick poll to make a decision. But once your form is ready, how can you share it effectively? Microsoft Forms offers a few ways to make it easy for your audience to respond - no matter where they are, or what platform they use. In this post, I’m showing you three (3) simple ways you can share your form, and the benefits of each.
Sharing via link
The quickest and most versatile way to share your form is by generating a link. This option works for any audience, whether they are inside your organisation or external. Once you copy the link, you can paste it into an email, chat message, on a social post… anywhere you like!
Here’s how to do it:
-
Open your form in Microsoft Forms.
-
Click the Collect Responses button at the top right.
-
Choose Copy Link from the top right of the pop-up window
EXTRA TIP: You can choose to shorten the URL, so that it’s much more user-friendly for sharing by ticking the ‘Shorten Link’ button before you copy the link.

Best for:
-
Sending forms via email newsletters or messages.
-
Sharing in group chats, forums or social media posts/messages.
-
Publishing as part of a blog post or on a website.
Generate a QR Code
For those times where you want to be able to share your Form offline, generating a QR code is a great option. When scanned, the QR code opens the form on the user’s device, where they can completely it instantly. Perfect for events, posters, or other printed material.
Here’s how to do it:
-
Open your form in Microsoft Forms.
-
Click the Collect Responses button at the top right.
-
Choose QR Code option from the main section of the right hand side the pop-up window to generate the QR Code
-
Download the generated code as an image, to add to your print materials OR display it on-screen during presentations.
Best for:
-
Event check-ins or surveys at in-person events.
-
Posters, brochures or signage.
-
Presentations or live workshops.

Embed the Form
Sometimes, you need to create something a little more dynamic. Something seamless and professional. This is when you can level up, and embed the Form directly into a website or intranet page. This method lets users fill out the form without navigating away from the page!
Here’s how to do it:
-
Open your form in Microsoft Forms.
-
Click the Collect Responses button at the top right.
-
Choose Embed option from the main section of the right hand side the pop-up window to display the HTML code you need to use.
-
Copy the code and paste it into your webpage or landing page editor, where you want the form to appear.
Best for:
-
Adding surveys or contact forms to a website.
-
Embedding feedback forms into an intranet or portal.
-
Providing a polished and user-friendly experience, especially for those who aren’t ‘tech-savvy’.

What is the best option for you?
Like everything I share about Microsoft 365, the way you share your Form is entirely up to you. It’s definitely worth taking the time to consider your audience, and how you plan to reach them. A link is the most flexible option, but a QR code really stands up when it comes to printed material. Embedding a form is about making the experience as user-friendly and seamless as possible.
Think about where your audience is most likely to engage with your form, and choose the method that best aligns with their needs.
REMEMBER to test your chosen method of sharing your form before it goes out to you audience, just to be sure it works the way you want it to. A few extra minutes of preparation can save you hours of added hassle later! My tip? Try it from a personal email address, or get a colleague to be a ‘guinea pig’ for you to make sure it looks right from another account (not yours!).
TL:DR? Here’s what you need to know
You can share a Microsoft Form as a link, QR Code, or HTML to embed on a website. Which one you choose is up to you, but it should meet the needs of your audience as a priority. Don’t forget to test it out before sharing it, to make sure it’s doing what you want it to!
If you’d like more tips and guidance on working with Microsoft Forms (or any other Microsoft tools), check out my YouTube channel for tutorials and step-by-step guides: https://www.youtube.com/channel/UC-B05_2yxkmrE3-Vxqd8LFw/

Comments